Follow me on Instagram
Saturday 10 March 2018

Superdrug Haul!

Superdrug Haul!
Saturday 10 March 2018
Read post


Hey loves, so I recently have been spending some £££ in Superdrug and I wanted to show you what I purchased! If you would like to see these products In action, watch this video or click the video above to see how they perform! I have included a picture of the swatches below, so please feel free to scroll to the bottom of the page to check them out! S x


1. First up, these wonderful foundation sticks from L'oreal. The shades are 140 (right) and 220 (left). I use the 140 shade for my foundation and I use the 220 for bronzing the skin. I think these are super creamy and blendable. The coverage is medium but buildable. In comparison to the infallible foundation in the glass bottle, its a little less coverage in my opinion but it still looks like skin. This does not budge all day and works wonders. My bronzing shade is a little on the orange side but if you go easy with the application, it can add a nice bronzed touch to your skin. 


2. Next up is this concealer from L'oreal. This is the infallible 24 hour concealer pomade! This looks exactly like MAC's soft ochre paint pot but has the coverage of the NARS soft matte concealer. It's extremely full coverage, blendable and dries to a soft matte finish. This is probably going to be one of my FAV concealers! 


3. To start off my little Barry M haul, I have these lip kits which are dupes for the Kylie Cosmetics lip kits (or so I think!). The shades are HUN (left) and BESPOKE (right). Hun is a very pale nude with pinky undertones and bespoke is a muted pink/purple. I have watched these and you will be able to see them further down the post! The texture is very thin and applies very smoothly. They dry down within a minute but can settle into the lines in your lips. My advice would be to wear a balm underneath so they're not super dry. They do not crackle or budge however! After the swatches, I had to literally scrub my hand! The lipliners are SUPER creamy, I love them! Lovely product with a balm! 


4. Quite possibly my favourite buys from my haul! These are the Barry M holographic eyeshadow toppers. Shades in the middle photo from left to right: Asteroid, Supernova and Luna. These are a creamy formula that apply beautifully with the doe foot applicator. I'm kind of over the holographic trend, I think it was taken a litttttle bit too far but when eyeshadows are concerned, I'm never over the magical holographic look! These have a lovely duo chrome colour to them and really make your eye look interesting. Again, these do not budge and will stay put. You can also use these for lip toppers (if you want to!) and for a base for glitter, during the festival season! They are slightly glittery and are PERFECT for a funky eye look. I believe there is one more shade I need to get my hands on, but I LOVE LOVE LOVE THESE!!


I hope you enjoyed this little haul! I forgot to photograph the bottom shade of the swatches. It's the crushed jewels eyeshadow base from Barry M in the shade of 'pillow talk'. I will however be doing a separate video once I have the whole collection so keep your eyes peeled! Don't forget to check out my video to see them live in action. What should I pick up from Superdrug next? 


Sunday 18 February 2018

Makeup Steal Sunday: Collection Glam Crystals

Makeup Steal Sunday: Collection Glam Crystals
Sunday 18 February 2018
Read post


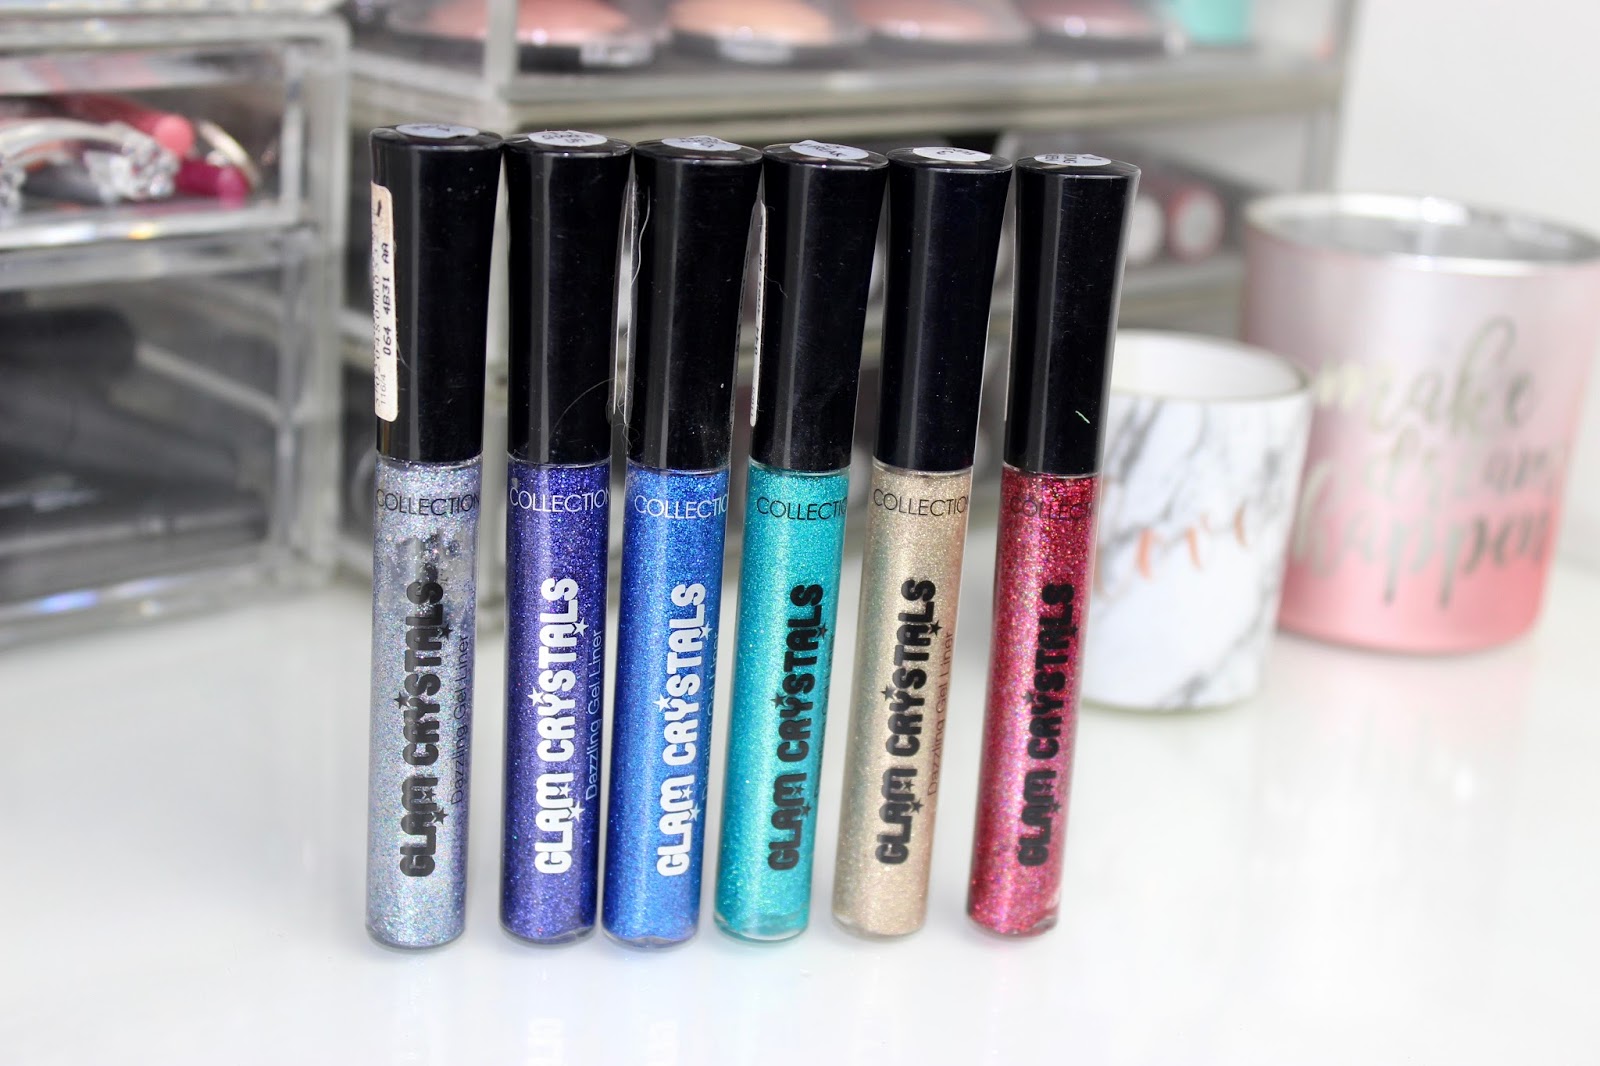
To start off my Makeup Steal Sunday, I am going to write about a product that I have had in my makeup collection for a long ass time! If you haven't seen these little guys whilst browsing in your local drugstore, I really recommend heading to the collection stand and having a browse. These wonderful glitter liners are perfect for eyeliner, as an eye base and even for your lips! They add a delicate touch of glitter to any look, at a very inexpensive price. At £2.99 a pop, you cannot go wrong!


The slick liner applicator makes it super easy to achieve a glitter winged liner, whilst also giving precision if you wanted to use this product as a glitter top coat. The colour pigmentation isn't super strong upon initial application, however it is buildable and doesn't dry to a glittery crackly mess! I find that the best way to use this product is to apply your normal liner and use this product as a top coat to really make the look POP. Some of the more pigmented shades (Le Freak especially!) can stain the skin so just be mindful of this. You don't want to use this on the night before work! 


I believe Collection are slowly realising more shades in this range, and as they are so inexpensive it would be rude to not pick them up. So far, I love my little collection and they are such wonderful pieces to have in your makeup collection. They can bring your look to life, whilst being subtle at the same time. I love the formula, the applicator and packaging. I cannot rave about these gems enough! 

Have you tried these before? what are your thoughts? 


Saturday 17 February 2018

Venice Itinerary - Things to do in Venice!

Venice Itinerary - Things to do in Venice!
Saturday 17 February 2018
Read post

Hey guys, so me and Ben visited Venice for a few days! It was super nice over valentines day - what timing and how cute!? We booked our trip through Expedia, which was really easy! Venice isn't really one for attractions or typically for 'things to do'. If you wanted to visit Venice, I would recommend including it in a week's trip to Italy, and spending a maximum of 2 days in Venice. Alternatively, if you are wanting to have a small day or two romantic trip away with your partner, this is perfect! We managed to walk the whole length of Venice in a morning, so it's super easy to go from one end to the other, whilst finding cool things to do in between! To save you planning your trip from scratch, I have listed what we managed to do during our trip, and take you on a journey with us from A to B.


We stayed at a place called Hotel Florida, based in Canneregio, which was the most superb location! Its located in a small alley way (a non dodgy one), right by the train station and a 2 minute walk from the Bus Station. To get from the Marco Polo airport, its roughly a 20-25 minute trip by bus! Furthermore, it's located right by the main shops, restaurants and boat trip stands! When booking your hotels, make sure you are directly in Venice. A lot of search engines tend to place cheap hotels outside Venice, meaning you'll have to get a bus/train back to your hotel. 


The first thing to do on your first day is to get checked into your hotel, and definitely head out to get some food! We stopped off at a place called Ai Scalzi and it was delicious! 


If like us, you are staying for two days, I really recommend getting lost in Venice! Usually with most places, we all have ideas about where we want to go and what we want to see but Venice is the exception. Every nook and cranny in Venice is beautiful and interesting, so in its own little way, the features of Venice are what makes it a big attraction. Our starting point was in a square, just by our hotel. Venice is famous for it's bridges and this certainly was one of them! Over this bridge you can endlessly see down the whole river, with all that surrounds it. 


One of the perks to getting lost in Venice, is the unknown! It almost feels like you're in a labyrinth, with one street leading to either another street, a bridge or a dead end! Here we had reached a dead end, but it was super cool to get a look at the turquoise river - and I promise it's beautifully turquoise! 


Luckily, we managed to see the tail end of the Carnival of Venice. Almost everyone was dressed up in fancy outfits with masks, whilst even the restaurants decorated with masks and fancy decor! I'm still not 100% sure on the significance of the masks, however I believe they are used to hide your identity and social status. A tradition that dates back to 700 years ago! Furthermore, I believe the carnival relates to celebrating Lent, 40 days before Easter. 


If you visit Venice, you will need to take your camera! With the small alleys and the wonderful bridges, its a photographers dream! Every angle and shadow is so prominent and all of the colours are brought to life! 


I will say, after seeing about 20 bridges It does tend to get a tad bit tedious! However, they really are something special. If you are a fan of architecture, you will LOVE this part to Venice! 


On our travels, Ben pointed out that part of James Bond's Casino Royal was filmed in Venice. This very building (the orange one) collapsed in the film. As you can see its all perfectly in tact because CGI is a wonderful thing!


As you travel towards San Marco, you reach the shopping part to Venice! There are a lot of expensive designer shops in this area. I struggled to find a Primark, although I'm not sure they're in Venice ;) 


Next up in San Marco is St Mark's square! This again has been featured in Casino Royale, and is quite the tourist attraction. Unfortunately, the queue to get into the Cathedral was suuuuper long! However, its a wonderful place to take photos. Around St Marks, there are also a few shops to mooch in with some restaurants to eat in! 


I would possibly go as far as saying that San Marco is my favourite part to Venice! As we went to Venice in February, it was a little chilly. On a super hot day, I would imagine San Marco being the place to be. It really is wonderful with its open front coast, with tonnes of bars and shops to visit. There are also a lot of little streets to wander down! Apart from St Marks, there isn't many more attractions to see, but theres something just so special about the views!


Finally, we stopped off and enjoyed a super delicious (but expensive) coffee on the coast! It was beautifully sunny and just enough to take the edge of the cold! We were at the coffee bar for at least an hour and It was so yummy! Italians really know Coffee!


Have you been to Venice before? What were your favourite parts! Let me know and I can always add them to a follower section on this blog post! It truly is a wonderful place to visit, especially for couples! Just be mindful that there isn't much to do once you've done it all in the day - However, thanks to endless bars and restaurants you can always try out different foods and wines!


Sunday 14 January 2018

New Concealers from Makeup Revolution!

New Concealers from Makeup Revolution!
Sunday 14 January 2018
Read post
Price: £4.00
Size: 3.4ml / 0.11 fl oz 
Purchase at Superdrug or TAM beauty 


Hello loves,
So straight into 2018 we have a new product launch from Makeup Revolution. I'm sure that if you are a beauty fanatic you will have heard of them by now. I love them because they release dupes for higher end products, just for a much smaller price tag! Now I'm sure we have also heard of the famous Tarte Shape tape concealer. Well by the looks of things, makeup revolution have been hard at work to create a dupe for that concealer and this is the final product!

I was super excited to try this new product from Makeup revolution and sadly I wasn't able to instantly get my hands on it because it had been sold out online! So I fancied my chances, popped into Superdrug and thankfully there was a beautiful new display of these concealers and I was able to get my hands on them! The shades i managed to get my hands on were C5 and C4.


There are 18 shades to choose from and this has been deemed to be the 'concealer for everyone' ranging from warm, cool and neutral undertones! Makeup revolution describe the concealer to be a 

"Lightweight yet full coverage concealer to cover blemishes, even skin tone and counteract dark circles, with a matte finish that won't settle or accentuate fine lines and pores. Long wearing intense pigment that can also be used to contour and add definition. Our large doe foot applicator allows for smooth application that won't drag on the delicate skin under your eyes". 
Packaging wise, it looks very presentable and I love the rose gold plastic component. More impressively, I love the big doe foot wand to apply the concealer! If you prefer a smaller doe foot to apply your concealer, don't be put off because you still have control over how much you would like to apply!


The first thing I noticed about applying the concealer, was that it wasn't too thick or thin, it wasn't too wet or dry, It was perfect. The texture is very smooth and upon application it does have a lovely medium coverage. The main difference I had noticed was the shade difference. It appears that C5 has more of a warm tone whereas C4 has more of a pink cool tone. I have been mixing the shades together as the undertones are just slightly off for me, but as a duo they work well!

C5 (left) C4 (right)

So whilst I was scanning the rest of my concealers in my collection I wanted to try and compare shades from other brands with the makeup revolution concealers! The comparison concealers all match my skin tone and they're ones I use interchangeably. I usually use these concealers when I am tanned and of course I have not got any fake tan on in these pictures, so if you are wondering why some look slightly different thats why! The collection one and the NYX one look slightly off because they have oxidised like mad!


Now lastly, I want to touch upon whether the product works or not. I go to different brands for different products. NARS has always been my go to for base and face products, MAC is my go to for lip products and Makeup revolution is my go to for eyeshadow products. Truthfully, I do not rate Makeup revolution for their base and face products, they just do not work with my skin. Now when this concealer came out, I was super excited to try it because of the hype surrounding it (I'm not alone I know you guys have done the same before!). 

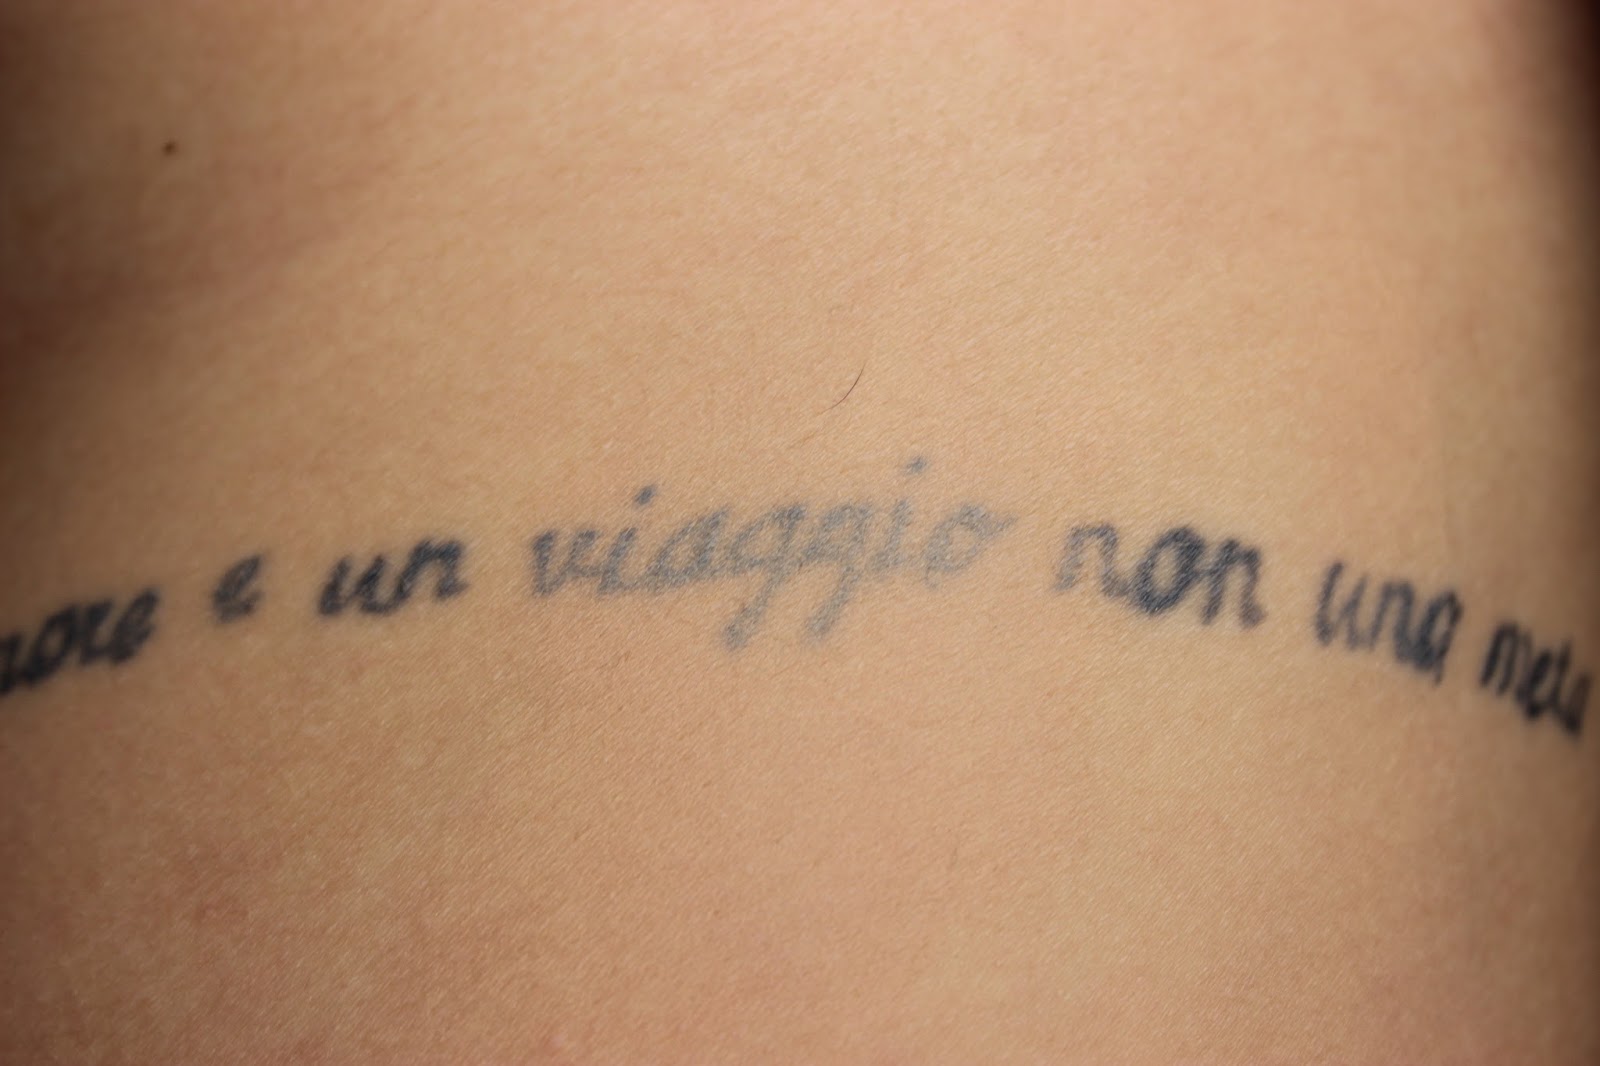
I have to say after trying this product, Makeup revolution has gone up in my estimations for their face products. This product applied and blended beautifully. If you want an extra bit of coverage, let it dry for a few seconds and then blend away. The texture is very smooth and it looks like skin! I would say the coverage is light to medium but buildable, thanks to the beautiful skin like texture. I do not think it is full coverage but I would say you can get a nice level of coverage if you build it. To demonstrate the coverage, I applied a dab to my tattoo and blended it in like I usually would. You can see it has covered some of the ink, but not enough to be fully coverage. 


All in all, if you are looking for a new concealer I would recommend trying this one out. It applies and blends like a dream. It does not oxides which I thank the high heavens above for! It also has a lovely texture and appearance on the skin, but if you want super duper coverage - this is not the one. I personally do not think high coverage and skin like texture goes hand in hand, I think you can pretty much get one or the other! For only £4, it is worth trying this concealer out because it may be your next ride or die product. In terms of the product size, 3.4ml is way below average of the normal size concealer which tends to be around 7-9ml, but again for £4 I really do not mind. 

Please let me know your thoughts - everyone has different experiences and ways of trying products so I would love to hear them!